3 inspection photos you should take to manage your risk

Last Updated November 22, 2023

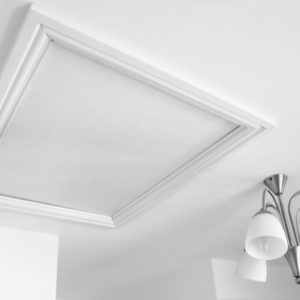
 In North Carolina, a home inspector performed an inspection on a property that had been vacant for about 18 months. During the home inspection, the inspector ran the water in the various fixtures, including the shower directly above the kitchen. The inspector photographed the kitchen, including the ceiling, which, at the time, showed no signs of any deficiencies.
Upon moving in, the clients found a large water stain above the kitchen sink and below one bathroom’s shower. The fact that the stain was dry created some suspicion as to how long the stain had been present. The claimants alleged that the stain must have been there all along.
However, the inspection photos showed the exact area now exhibiting a water stain. The photos revealed that there was no staining at the time of the inspection. It was possible that the shower test caused the water damage. However, the inspector could not be responsible for the damage caused during the course of normal inspection operations.
The power of inspection photos
In case you haven’t heard it enough, here’s the old adage again: A picture is worth 1,000 words. In an industry like home inspections, photos can do wonders. They can help inspection clients understand your findings and put them into context. They can bring reports filled with descriptions laced with technical jargon to life.
In our article “How to write a report that clients understand,” Barry Wong, Owner of Building Specs Hawaii, LLC in Hawaii, shared how photos are in both the client’s and your best interest.
“We document everything with pictures to back up what we’re actually saying,” Wong said. “That makes it easier for the client to understand what’s actually happening, [which]…makes my job much easier, too.”
From a risk management perspective, photos can prove what was there on the day of the inspection—and what wasn’t.
As insurance providers to home inspectors, our philosophy is that you cannot take too many pictures. The more pictures you have, the more evidence we can have to defend you against meritless claims.
A cautionary tale
 Unfortunately, few home inspectors take enough pictures. In a claim still being resolved, the claimants allege that the inspector failed to identify wood rot in a window. Based on the photographs the claimants provided, it appeared that the inspector may have, in fact, missed the wood rot. After all, the rot was in an area that should have been readily identifiable at the time of the inspection.
When we spoke with the inspector, they asserted that the wood rot wasn’t visually identifiable during the inspection. However, the home inspector could not provide any photographs proving that the wood rot wasn’t visible at the time of the inspection. Unfortunately, the home inspector did not have a single picture of the window in question. The inspector’s defense: “I only take photographs of deficiencies. If I do not have a photograph, then there was no deficiency.”
Without evidence, it’s difficult to prove that the condition didn’t exist at the time of the inspection. Lucky for the inspector, our claims professionals did some research of their own. Our team discovered photographs of the window in the property listing online. While the photographs are not the highest resolution, they show that the window did not exhibit any evidence of wood rot at the time the listing photos were taken prior to the inspection. Thus, the listing photographs provide significant assistance to our claims team in preparing their argument.
However, photographs from the day of the inspection are always more compelling. In addition, the home inspector is lucky that our claims team was able to find photographs of the window in question at all. As follows, it’s imperative that home inspectors take as many photographs of the inspection as they can lest they fall victim to chance.
3 inspection photos you should take to manage your risk
In this article, we go over a few of the essential but often overlooked inspection photos you should take at your inspections. While not technically exhaustive, this list serves as a reminder of what a powerful risk management tool inspection photos can be. After all, one of these inspection photos could help you stifle a claim.
The non-defect area
 As a home inspector, it’s your job to visually examine and report on the home’s physical structure and systems. For many home inspectors, that starts and ends with discovering and describing defects. However, non-defect areas are important to photograph, too.
While they may not end up in your report, pictures of non-defect areas provide a snapshot in time. They testify of the home’s condition on the day of the inspection. That documentation can assist you in defending against allegations regarding defects that occurred post inspection.
Both of the examples provided thus far illustrate how important it is to photograph non-defect areas. In his article for the Spring 2017 issue of the Florida Association of Building Inspectors’ (FABI) issue of Florida’s Inspection Voice, InspectorPro’s past program director, Ryan Osborne, shared an additional example:
A client complains about an issue that you are certain was not present during your inspection. This does not refer to a hidden defect, but something that you definitely would have noticed if it was present during the inspection.
Your first step to explain or refute the issue would be to review the photos you took during the inspection. Some inspectors take only pictures of the problem areas, so consequently there may not be a record of the non-problem area. Taking photos of areas that don’t have issues is a cheap and easy way to avoid frivolous claims in the future.
Thus, be sure to take pictures of not just what’s wrong with the property but what’s right. After all, you never know if the client will point the finger at you when functioning systems go awry in the future.
The concealed area
Whether accidentally or purposely, sellers, buyers, and agents may conceal areas of the property. Furniture and belongings often obscure your view, giving you an incomplete picture of the property. While you’re only responsible to inspect what’s visually identifiable, it helps to be able to prove what was and what wasn’t visible at the time of the inspection.
In Louisiana, claimants alleged that an inspector failed to identify water intrusion in the property’s hallway. The evidence of water intrusion was located in an area that the seller’s belongings concealed (presumably intentionally), and the inspector’s photographs proved it.
Not included within the inspection report but contained within the photographs the insured retained for their own records was a picture of the exact area in question. The photograph illustrates that, at the time of the inspection, the sellers had placed a rack and a blanket directly in front of the area that evidenced the existence of water intrusion. The insured’s photograph clearly shows that the area was concealed and, thus, not readily identifiable. We denied the inspector’s liability with no offer of settlement on the insured’s behalf.
In another claim, the clients alleged that the home inspector did not report the water damage to a specific area of their hardwood floors. Upon reviewing the inspection photos, the home inspector found that, at the time of inspection, a large potted plant had sat in that same water damaged area. The photograph proved that the inspector couldn’t have seen the signs of water damage during the inspection. Furthermore, it revealed that the plant caused the damage.
In both of these cases, inspection photos of the concealed areas bolstered the inspectors’ defenses. Without photographic evidence, it would have been the claimants’ words against the inspectors’.
The inaccessible space
 On occasion, weather, the owner’s belongings, or safety issues inhibit your ability to inspect a space. Perhaps rain makes it unsafe to climb up and inspect the roof. Or maybe piles of boxes are blocking your access to the attic. Alternatively, perhaps the crawlspace has too little clearance to enter.
Whatever the reason, it’s important to photograph just what is inhibiting you to inspect the area and explain the reason in your report. Failure to do so could lead clients to second-guess whether the area really was inaccessible or your responsibility to investigate anyway.
Three months following his inspection of a 111-year-old property in Washington, the home inspector received a complaint. The claimants alleged that he had failed to identify broken and insufficient floor framing. Furthermore, the claimants demanded that the inspector pay for renovations so that the property could meet current building and regulatory codes. A foundation contractor provided a bid of over $30,000 to repair and replace the structural deficiencies.
The home inspector’s report provided a strong defense. In the inspection report, the inspector identified several structural deficiencies. In addition, he noted that insulation limited visibility to the foundation and floor framing components. Furthermore, based on the claimants’ photographs of the claimed structural damage, two of the allegedly broken beams were, in fact, separate beams without defects. With his evidence in hand, we denied the home inspector’s liability and offered no settlement to the claimants. The insurance claim closed at no cost to the inspector.
Be sure to photograph partially or fully inaccessible spaces to defend your business from potential liability.
Key takeaways
It may seem tedious taking photo after photo. However, inspection photos are one of the best ways to manage risk. Don’t let your next allegation be a battle of “he said, she said.” Take lots of pictures so that you have a photo to back you up in every scenario.
While inspection photos provide fantastic defense, they cannot always prevent clients from filing claims in the first place. That’s why it’s so important to carry errors and omissions (E&O) and general liability (GL) insurance to protect your home inspection business.
If you’re already insured with us, be sure to complete your annual renewals on time to avoid a lapse in coverage.
If you’re not one of our insureds but would like to be, simply apply today for a no-obligation quote.
This article was published in the ASHI Reporter in April 2019. See how this story appears in print below.